Building a Mini Softbox
December 15, 2010
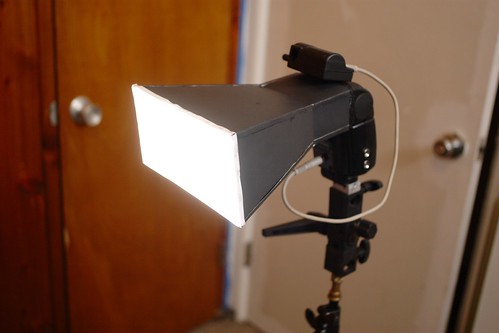
For a shoot I’ll be doing soon, I need a big-ish light source a little more directional than my usual umbrella, so I decided to throw together a little posterboard softbox. I thought I’d have it together in a snap and move on to shooting my subject tonight, but it turned out to be a much, much more time-consuming endeavor than I’d intended. In the process I came up with some templates for the pieces and thought I’d share them, along with a little review and some instructions.
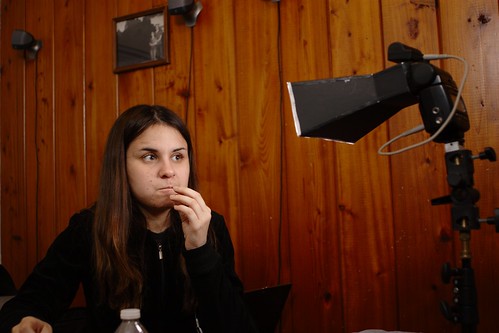
The softbox is a little more than four times the size of the bare flash head. It’s not a whole lot softer than a bare strobe at any significant distance, but in close it does pretty well. In my case, it’s going to be used on a snow globe, so I’ll be working with a light source almost as large as my subject at close range. I got my girlfriend to let me use her as a guinea-pig for some test shots, and in close it makes a half-decent key light for a portrait. At that kind of range, though, falloff is fast, so it’s important to have a good fill light to back you up.
Putting it together is a little time consuming, but not too difficult. Just grab the template files and print them at 200 DPI, two copies each of the side and top/bottom templates, and one of the panels template. Super-glue the sides and top/bottom templates to a sheet of black posterboard, cut them out, and cut notches so that you can fold the flaps on the edges down. Once the flaps are folded down, you’ll want to cut the copy paper off of the flaps so that the posterboard pieces stick together well, but leave it on the inside of the softbox. Glue all four pieces together (a little bit of superglue on the flaps should do the trick) at the base that wraps around the flashhead, and then glue the smaller diffusion panel (I just cut the panels straight out of white copy paper) in place right where the softbox starts to widen up. You may need to cut the smaller panel down a little bit to make it fit in there: in mine, the flaps of the outer pieces made it a little difficult to fit in. The smaller panel diffuses the light before it gets to the actual surface of the softbox, to make sure that you get a nice evenly lit surface on the front. I haven’t tested it, but I suspect that without that panel the base of the softbox would act as a snoot, and you’d get a nasty hotspot in the middle of the outer diffusion panel.
With the small diffusion panel in place, just glue the rest of the softbox frame together by the flaps. Before attaching the outer diffusion panel, you’ll need to trim a little bit off the front of the frame where the flaps stick out; sorry, I didn’t take the time to properly bevel them in the template. Then just cut out the larger diffusion panel and glue it in place on the front. I glued it with the flaps on the outside, but if you’re reallyadventurousyou can try to get them glued down on the inside. Then just let it dry, and your softbox is ready. It should be just about the right size to stick on the front of an SB-25 or SB-26 with a little bit of velcro on the head, and it should also fit the 580EX, but I haven’t tried it on mine yet. If you have a flash with a smaller head, feel free to modify the templates and repost them. If it helps, I’ve uploaded the raw XCF files with the guidelines I used to draw the templates.