Automating Mass Portraits With QR Codes
May 15, 2012
For Mother’s Day this year, my church decided to offer free portraits. We did something similar for a back-to-school event last year, and while it was well-received it also ended with our communications director spending the better part of a week sifting through photos and breaking them up by family. This time around, I decided to see if I couldn’t automate that process, and in the end we managed to pull it off with almost no human post-processing effort, and no extra equipment aside from a box full of printed cards. We sent everyone home with a card that gave them everything they needed to get their photos online the next day. You can find all the code I wrote to make it work in theGithub repositoryI set up for the purpose (click the “Zip” button at the top of the page if you just want to download everything). You’ll need Python to run my scripts, and a web server that supports PHP if you want to use the web viewer. This is how I made the whole thing work, and how you can replicate the process.
The Concept
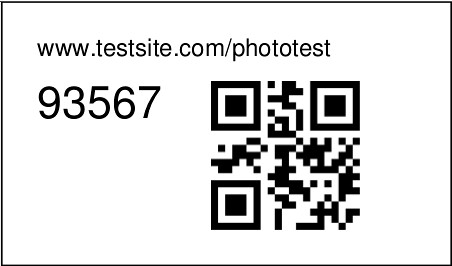
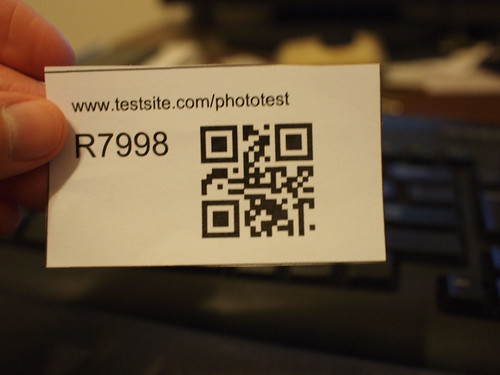
Before we get into implementation details, let’s just go over how things went from the client’s perspective. We shot portraits before and after our Saturday and Sunday services, for a total of about 90 families. We had a table set up apart from the actual portrait setup where volunteers would hand incoming families a copyright release letter (so they can print their photos without issue) and a business card sized slip with a URL, a unique alphanumeric code, and a matching QR code printed on it. That card was what made the magic happen, and we’ll go into them in detail soon.
From there, the greeters directed them to one of the photographers: there were two of us working, one indoors and one outdoors. Clients were free to visit both, but most just went to one or the other. When one of them actually got to a photographer, we would snap a photo of their card, making sure the QR code was clearly visible, and then just go ahead and shoot the photos of them. Starting the next day, they were able to visit the URL printed on the card, type in their code, and view/download their photos. So, how did we get this all to work so smoothly?
Step One: Generating the Cards
Of course, the very first thing to do was to get those cards
printed. To actually generate the cards, I wrote a script called
gencards.py. If you’re following along at home, you’ll find it in
the scripts/ directory of my repository. This script is run from the
command line and accepts two arguments: the number of cards to
generate and the file to write them to. Give it a few seconds to run,
and it spits out a PDF that you can print with your desired number of
cards, each with a randomly generated code and a matching QR
code. Just about every aspect of the generator is customizable, but
you’ll have to edit the script to change them. If you open it up in a
text editor, at the top you’ll find a section labeled “User
Parameters.” By changing the values in that section, you can change
the URL printed at the top of the card, the positioning of the card
elements, the page size, and some other details. gencards.py uses a
program called qrencode to generate the QR codes, so you’ll need this
program installed and in your system path for the script to work.
Luckily enough, we have a staff member who works for a print shop, so he was able to get a couple hundred of these cards printed up easily enough. With a box full of cards (and the copyright release letters), we were all ready to go with our printed material. From there I just needed the software to handle post-processing after the event.
Step Two: Splitting up the Photos
When we actually shot the photos, the crucial step was snapping a shot
of each client’s card before starting their session. Afterwards, a
script I wrote called sortphotos.py was able to comb through them
and split them up into directories by their codes.
sortphoto.py takes just two command-line arguments, the input directory and the output directory. It goes through every photo in the input directory (and any subdirectory of it), and copies the photos it finds into the output directory split up by the code cards that come before them. It uses a program called ZBar to actually read the QR codes, and ImageMagick to resize images prior to reading, so you’ll need to ensure that both of those programs are installed and in your system path for it to work.
It’s also capable of handling RAW files, using ufraw-batch to do the
RAW conversions. To make this work, obviously, you’ll need ufraw-batch
installed. To control the RAW conversion, you’ll want to load one of
your RAW files in Ufraw and save a .ufraw file with the settings you
want to use. Just put the .ufraw file in your input directory, and
it will automatically be used for all the RAW files in the
directory. If you want to use different settings for different files,
you can put them in different subdirectories with ufraw files in each
of them, and the script will always use the one closest in the
directory tree to the RAW file.
Step Three: Generating Thumbnails
In our case, this was actually step four, but hopefully you’ll learn from my mistakes and do it third. If you’re going to post your freshly sorted photos on the web, you’re probably going to want smaller thumbnail sized images to display. The viewer script that I wrote to display the images online will generate thumbnails if none are present, but it’s oblivious to the EXIF rotation attribute so vertical images may appear sideways, and if there are too many or too large of images (this was our problem) it could run up against PHP’s memory or time limits and crash. To solve that problem (very frantically after uploading all the photos and finding them not displaying, I might add), I wrote a simple script that uses ImageMagick to generate thumbnails ahead of time. It improves site responsiveness, it avoids potential PHP crashes, and it makes better looking thumbnails to boot.
The script is called genthumbs.py, and it accepts three command-line
arguments: the input directory, the maximum width, and the maximum
height. The script then finds all the images in the input directory
and its subdirectories, and for each one generates a thumbnail image
with width and height no larger than the given maximums. It names the
thumbnail originalfilename_thumb_.jpg, so for instance a thumbnail
of img1.jpg would be img1_thumb.jpg. This is the convention that
the web viewer expects, so the generated thumbnails will work
flawlessly with it.
Step Four: Uploading and Viewing
After the images were sorted and the thumbnails generated, the last
step was to host them on the web so clients could retrieve their
images. For that, I wrote a very simple PHP script that you’ll find in
scripts/web/ in my repository as index.php. The design is no work of
art, and the source code is far from perfect, but it’s a quick script
that works well enough. If you’re using the system professionally,
you’ll probably want to improve the web viewer script (and if you do,
feel free to make a merge request with my repository, I’d love to add
your improvements).
Assuming that the viewer as-is will work well enough for your needs,
you just need to put both it and the sorted photos up on your web
server where they’re visible by the public. You’ll need to change two
constants at the top of the viewer script, PHOTOS_LOCAL and
PHOTOS_WEB, to make it work correctly. Set PHOTOS_LOCAL to the
path on your server to the photos directory and PHOTOS_WEB to the
URL that points at the root of your photos directory. In most cases
these will probably be the same (when we deployed it they were), but
having them separated gives you a little bit of extra flexibility if,
for instance, the two are being served from different domains on the
same server.
Once the viewer is up, typing a code with images associated with it into the text box will bring up a page showing thumbnails of the images with links to the full size files. You can also add &index=t to the end of the page URL to include the card shots along with the actual photos (they’re normally not shown to the user). If the user enters an invalid code, they’ll see a friendly error message and a prompt to try again.
Conclusion
Aside from a small panic when I realized that my viewer script was crashing while generating thumbnails, everything went wonderfully smooth. We got everyone photographed and the photos posted and sorted without too much effort, and we used no special hardware or commercial software in the process. I realize that operating these scripts may be a little complicated for some, but I’m hoping that if you’re in a similar situation to us they can help you out. If you’re part of an organization trying to offer a similar service and having trouble getting anything to work, feel free to contact me with questions. And of course if you make any improvements to my scripts, I’d love to see them!
Update - Per a suggestion I received on Github, I’ve changed the
standard filename for web viewer thumbnails from thumbfilename.jpg
to filename_thumb.jpg. If you already have thumbnails generated and
you change to the new version of the viewer script, you’ll need to
make sure to regenerate your thumbnails.