Carrying Cameras
September 30, 2016
When I first started photography, I had a pretty straightforward method for carrying cameras with me: I threw the strap over my shoulder and carried them. If I needed two, I threw one strap over each shoulder. If I needed to carry, say, a 300 f/2.8 around with me, I put it on a monopod and threw that over a shoulder, or just threw the lens strap over my shoulder and carried everything that way. When I first started photography, I was also fifteen years old. That was a little over a decade ago, and nowadays my shoulders–and my back–are a little less rugged than they used to be. So for the past couple years, I’ve put some effort (and more money than I’d like to admit) into working out the best way to carry cameras around with me. In particular, in the last couple of months I’ve been working on coming up with the best way to carry a pair of cameras, a long lens, and some supplies with me on long-ish treks–so far up to about eight miles at a time. This is what I’ve come up with.
Transition to Micro 4⁄3 and the Black Rapid Strap
A couple of years back, I traded in my Canon gear for Olympus’ micro 4⁄3 system. At the same time I was buying this new, lighter equipment, I decided to try out an interesting-looking strap that I’d seen someone using at a meetup, the Black Rapid. The particular model I bought isn’t available any more, but its nearest current model equivalent seems to be the Cross Shot Breathe. The idea is fairly simple: you screw a little metal fastener into your tripod socket, and then you throw a strap across your body with a metal loop that glides over the strap connected to a small carabiner clip. You connect the clip to the fastener you just screwed onto your camera, use it as leverage to tighten the fastener down a little more, and then you’re good to go. The camera hangs at your side upside-down, and when you pick it up the whole assembly just slides right up the strap as you raise the camera to your eye. Then you can put it right back down again without thinking about it, because the strap is still across your shoulder.
All told, this worked pretty well. My new kit, the E-P5 and a couple of prime lenses, was very light, and I would barely even notice the camera on the strap at my side. Usability-wise it was convenient, although when Olympus started building–and I started buying–bigger lenses with tripod feet things started to get a little bit more complicated. Removing the fastener from the camera is a bit of a pain, and I would have to swap it if I attached a longer lens that needed to hang from its foot. Still, things were mostly okay.
Then one day I decided to take a long walk through Robinson Preserve, a nature preserve in my home town, and I realized the strap had one big drawback: if I wanted to carry two cameras and any other supplies, I’d need to bring a backpack. And backpack straps don’t work well when you already have a camera strap slung over your shoulder. After a four-ish mile walk and all the neckchafing that came with attempting to wear both a backpack and an over-the-shoulder camera strap, plus some back pain from carrying that much weight on my shoulders, I decided to try something new.
The Spider Pro Black Widow
My first attempt at carrying two cameras with a shoulder strap was an ad-hoc affair. My wide-angle lens came with a lens bag, so one day I decided to try threading my belt through the draw-strings of that bag, and stuffing the lens, with my smaller camera attached to it, into the bag as far as it would go. My make-shift holster, surprisingly enough, worked. Kind of. After a couple of near disasters with the camera coming loose, and a constant struggle to get itout of the bag when I wanted it, I decided I should probably invest in a real camera holster. What I ended up buying was the Spider Pro Black Widow.
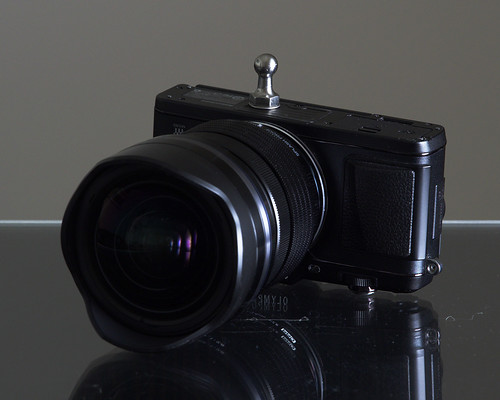
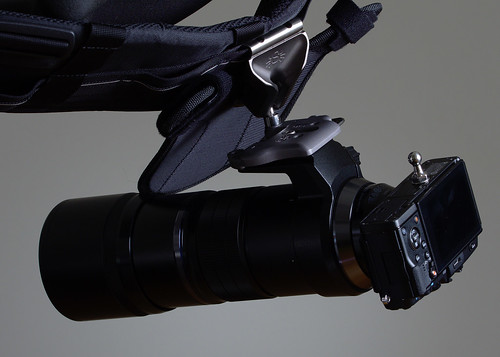
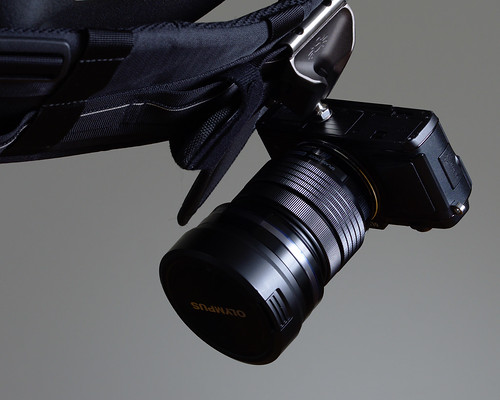
The black widow is a chunk of mostly plastic with some metal reinforcement about the size of my palm. The concept is pretty simple. The holster itself attaches to your regular belt, you just thread it right through. The thicker the belt the better. You attach a pin to the tripod socket on your camera with a ball at the end, and that ball slides into a groove on the holster. The top of the holster is a kind of funnel that makes it easier to fit the ball in, and at the bottom it clicks into place. There’s a plastic toggle you have to press open to get the camera out afterwards.
All things considered, this worked pretty well. My E-P5 was well within the weight limits (the Black Widow is ideal for mirrorless and other smaller cameras, it can get a little iffy with a full-sized DSLR), and the holster allowed me to carry my smaller camera on my hip while wearing the bigger camera with a long lens over my shoulder. It was almost the perfect setup for long walks through nature: long lens for wildlife, wide lens for landscapes, both available in an instant. I used it happily for some time with my E-P5 and 7-14 f/2.8 on my hip and my E-M1 and 40-150 f/2.8 over my shoulder.
That being said, everything wasn’t perfect. My chief annoyance with the Black Widow holster is the pin that you attach to the camera. You have to tighten it with a hex wrench that comes in the package, but there’s no convenient way to attach the wrench to the camera. I keep mine in my camera bag, with the expectation that I just won’t remove the pin in the field. If you’re planning on moving back and forth from a tripod, however, that will be an annoyance. Especially because you have to put a washer in between the pin and the camera, which is liable to get lost if you’re doing frequent changes out in the field. There is also, as you’re probably imagining from the photo of it, some annoyance inhandling the camera with a metal pin sticking out the bottom. I haven’t found this to be an insurmountable problem, and I’ve adapted my grip slightly to accommodate the pin, but it’s something to keep in mind.
One final note on the Black Widow holster, which I just tested out recently, is that you can also use it with the plates for Spider Pro’s other holsters (which we’ll be coming to in a minute). Because my micro 4⁄3 kit is so light, I’ve discovered that I can safely attach my E-M1 and 40-150 f/2.8 combo to it for a great walking-around combo at events that doesn’t draw a lot of attention. Even though I don’t use it for longer trips any more, I still keep the Black Widow around for this kind of light usage.
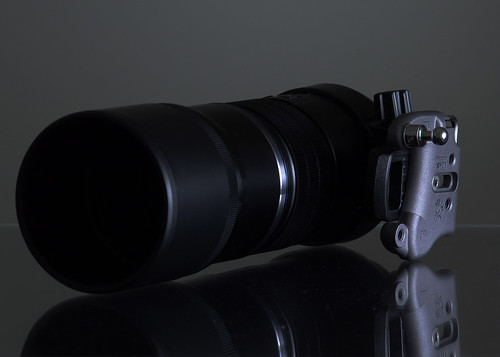
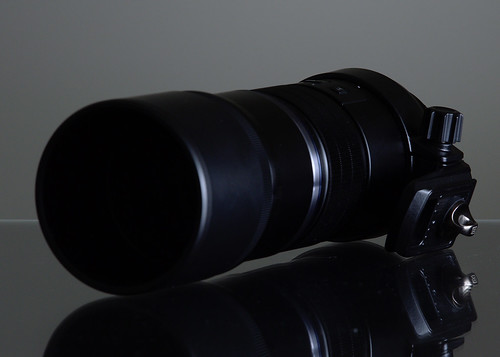
The Black Rapid / Black Widow combo worked great for me for a couple of months, and then Olympus released the 300 f/4. This is their longest micro 4⁄3 lens to date, and while it is significantly smaller than lenses with comparable reach for a DSLR system, it is still a super-telephoto. Accordingly, it’s fairly heavy in absolute terms. It is, however, eminently usable handheld because of the impressive image stabilization built in, which led me to take it out, without a tripod, hanging from my Black Rapid strap for an inaugural test run. One three-mile walk through LA’s hills later, I found myself with a shoulder ache. It wasn’t the end of the world, but it didn’t feel great either, and it called into doubt for me whether I’d be able to effectively carry the lens this way on longer trips. Which is what prompted me to put together my latest solution.
The Spider Pro Holster
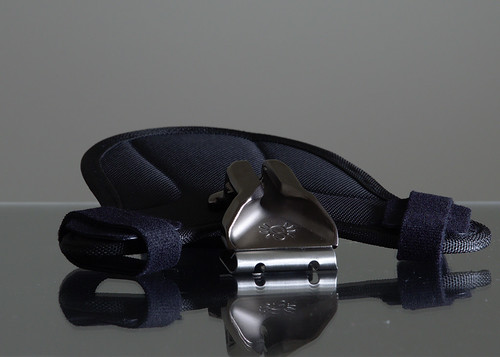
The Spider Pro holster is the bigger, sturdier product that the Spider Pro Black Widow is based off of. It has three primary differences. First, the whole thing is made out of sturdy metal. Second, instead of a simple toggle at the bottom to allow camera extraction, it has a switch that can lock into the open position as well, allowing you to remove your camera without having to touch the holster. And third, it comes bundled with a pad that slightly cushions your hip from the weight of the camera hanging from it. It also comes with a slightly different mechanism for attaching to the camera, an entire metal plate instead of just a pin.
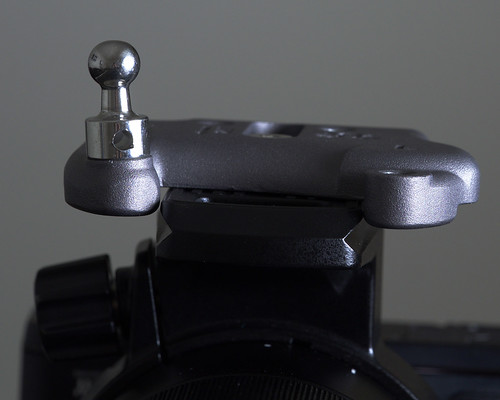
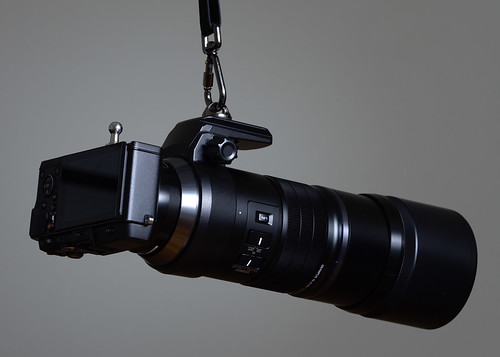
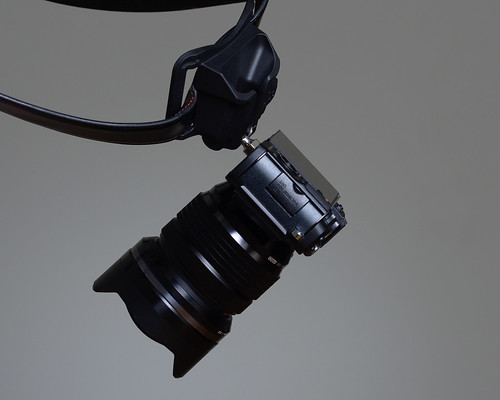
The plate screws into your tripod socket, and it has a pin which screws intoit, but offset such that the camera ends up hanging upside down and backwards and slightly away from your body, so it doesn’t press intoyou as much as it would otherwise. The plate attaches to your tripod socket with a screw, which you’ll need an Allen wrench to screw and unscrew. Conveniently, the included Allen wrench fits securely into a spring-loaded holder in the plate itself, so you’ll always have one with you if you’re using the holster. One word of caution on the Spider Pro plate: out of the factory, the pin is screwed into the plateextremely tight. While you are supposed to be able to switch it from one side to the other for left-handed use, the company attaches it so tightly that they recommend buying another pin if you want to use your camera on the left side of your body. I bent the included Allen wrench and a couple of other smaller metal tools I had lying around trying to unscrew it until I finally found a precision screwdriver exactly the right side for the hole that was sturdy enough to unscrew it. So if you’re planning on switching the pin to the other side, be prepared with something sturdy to lever it with.
The company actually recommends screwing the pin directly into the tripod feet of long lenses, but I’ve found that both my 40-150 f/2.8 and my 300 f/4 work great with the plate simply screwed on to the tripod foot. It can make hand-holding those lenses a little bit trickier, but I’ve managed to work out a pretty decent grip with the plate cradled in my palm and the pin nestled into the crook of my thumb. The plate also fits perfectlyon my E-M1 if I want to carry it by itself with a shorter lens, although it makes my usual grip–one hand on the camera grip and one supporting from underneath on the battery grip–somewhat uncomfortable. Instead I usually just go to a grip with one hand on the camera grip and one on the lens. Be warned, however, that the Spider Pro plate doesn’t mix well with smaller cameras with articulating screens. If I put it on my E-P5, it becomes impossible to pop out the LCD screen, because the plate sticks out the back and blocks the screen’s arc of travel.
The holster itself, of course, is only half the battle. Unlike the Black Widow, you can’t mount this thing to a standard belt. Spider Pro wants you to buy their belt for it, but I’ve read reviews claiming that the belt they ship is somewhat flimsy and doesn’t really provide any back support. Spider Pro also offers conversion kits for other photo belt brands, so I ended up choosing to buy the LowePro Street and Field Technical Belt. This is a pretty significant belt with some back support and plenty of padding, and it uses LowePro’s slip-lock system which makes adding attachments fairly straightforward. I bought the belt, plus two of Spider Pro’s holster kits for it. The Spider Pro holster is a little bit tricky to install as it takes some work with a small screwdriver, but once it’s on it stays on. The holster itself hooks through one of the slip-lock slots, and the two ends of the pad each attach to another adjacent one with velcro. That way if the main holster attachment gives out, the velcro willact as a last resort to keep your camera from plummeting to the ground.
The S&F belt isn’t perfect, but I like it overall. I wearit with a utility bag (which has room for my phone and a battery backup for collecting GPS logs, bug spray and sunscreen, wallet, keys, and I can cram my non-weather-sealed compact camera in if it rains) and a water bottle holder attached, along with two Spider Pro holsters, which takes up most of the space on the belt. If you buy the large version of the belt it gets you two more slip-lock slots, but I imagine you’ll need a pretty big waist for that. I’m 5 foot 11, about 165 lbs, and I have to wear the small version tightened up almost all the way to fit me.
This allows me to comfortably carry my bigger camera with long lens on my right side, my smaller camera with wide lens (the Black Widow pin will fit into the Spider Pro holsters) + utility bag on my left side, and the water bottle holder directly behind me fairly comfortably. It keeps my shoulders and arms free, and at the end of an eight-mile walk with it I noticed slightly more fatigue than usual on my knees and waist, but it was nothing compared to the shoulder and back pain I otherwise would have experienced. I probably couldhave walked another eight without the equipment causing a problem for me.
I usually leave the holsters in the locked-open position. While at first I was worried that my cameras would fall out somehow if I didn’t keep them locked while walking around, I’ve come to realize that’s almost impossible. The groove in the holster is sufficiently deep that the camera’s not coming out unless you do cartwheels in it–and even then, probablynot. The only time I lock the holsters now is if I’m taking the belt off and throwing it fully-assembled into my car on my way to a destination.
Nothing’s Perfect
All things considered, this is an excellent setup for me. It lets me take reasonably long trips out into the field, carrying some very significant reach along with a good wide-angle lens, plus some supplies, all without putting any strain on my back or shoulders. And the Black Widow holster which I’m still hanging on to gives me a solid, low-key option to carry a lighter camera/lens combo around for more casual shooting. I will, however, close with a couple of gripes about the belt and the holsters.
First and foremost, the buckle on the LowePro S&F belt is, to put it bluntly, pretty sad. It’s basically the kind of connector you use to buckle a kid into a grocery cart, but scaled up significantly. It can support the amount of weight it needs to without issue, but the problem is that all it takes to release it is simultaneous pressure on the top and bottom. While I’ve never accidentally released the belt, when I first started using it on multiple occasions I found that the bottom part of the connector had come partially undone. This was, understandably, distressing. The problem, I finally realized, was my belt buckle. Not the buckle on the LowePro belt, but theregular belt I was wearing underneath it. When I crouched down, a metal bit of my belt buckle would press directly into the bottom portion of the LowePro belt’s buckle, partially releasing it. My solution has been to buy an elastic belt with a thin, flat buckle and use that while wearing the LowePro belt. Since making that change I haven’t had any issues with accidental releases. An Amazon reviewer recommended replacing the stock buckle with an airplane seatbelt buckle, which I imagine is an excellent solution if you know how to do that kind of thing. I don’t, so I settle for wearing a less obtrusive belt underneath.
The other problem with the LowePro belt is the tightening mechanism. This isn’t a critical flaw, so much as an annoyance. If you’re on the smaller end of the belt’s range (as I am, apparently), you’ll find yourself with a lot of spare webbing after you’ve tightened the belt. They include an elastic band on each end that you’re supposed to use to secure the bundled up extra webbing in place, but they have a tendency to come loose and I always have to keep an eye on it and make sure the belt is still appropriately tightened before going out to shoot. I’m contemplating trying hair clips or something similar, but as of yet I don’t have a good solution for this minor flaw.
And finally, I’ve noticed that the belt loop my right-side holster is attached to (that’s the one I’m wearing my long lens on) is starting to fray ever so slightly. I’m hoping this will never progress enough to threaten the integrity of the belt, but if it does I’m a little worried about getting it covered by warranty. Will LowePro replace the belt, or will they claim that the SpiderPro holster was an unsupported accessory? And will SpiderPro refuse to do anything about it because it was the belt that failed, rather than their product? Hopefully I never have to find out. At least it has the velco backup, so I’m not worried about any catastrophic loss if the worst does happen and the belt loop gives way.