Largeish Format, Part IV: Stitching The Images
August 2, 2018
This is the fourth and final part of my series on creating stitched large format digital images.
Now that you’ve shot the individual parts of your scene, all that’s left is to stitch them together into one giant image. For this task you are of course free to use whatever software you’re comfortable with (and you may very well not need my help here), but for anyone who’s not familiar with panorama stitching I’m going to lay out the procedure I use with Hugin, an open source, cross platform panorama editor and stitcher.
As a disclaimer, I’m not by any means an expert on panorama stitching. However, I seem to have found a technique that more or less works for me, so I’m going to present it here in the hopes that it can help you.
Before you can stitch your images you need to get them into some kind of a raster format. That general post-processing step will vary with your particular workflow, but the key is to make changes uniformly across the entire set of images. For me, I try to pick a representative sample of the general exposure and dynamic range of the scene, and edit that image in Darktable until it looks the way I want it to. Then I copy/paste the history stack for that image to the other images in the set, and export them all as TIFF files in 16-bit color.
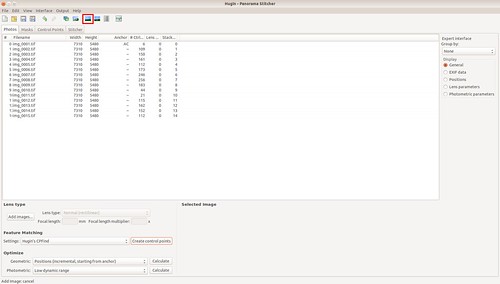
Once you have your images ready to go, fire up Hugin. I recommend starting out by clicking “Interface” in the top menu and selecting “Expert.” The “expert” interface isn’t especially more complicated than the fully guided mode, and it will help you get the most control over your images. Start out by clicking the “Add images” button in the main interface, and select your full set of images.
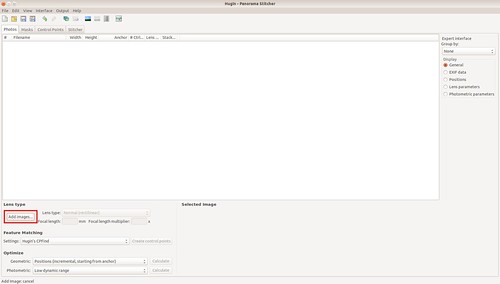
Hugin will pop up a little dialog box asking you for the focal length of your lens. This is a little bit less important here than it would normally be due to the fact that your images are all taken from the same flat plane, but I’ve found that giving it the actual equivalent focal length of the lens I used (on the back or camera you actually used to capture the images, not the large format camera you mounted it on) seems to work well enough. Once your images are initially loaded, you’ll see a screen something like this.
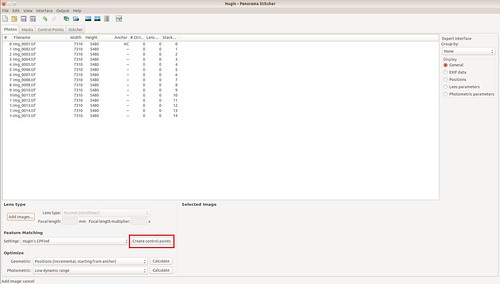
From here you’ll want to click the “Create control points” button, which will scour each of your images for points of particularly high contrast that it can use to identify overlaps between images. This may take a minute or two. Once Hugin finishes finding control points, you’ll get a view like this, which shows the number of control points found in each of your images.
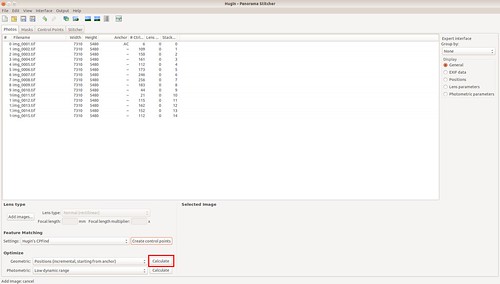
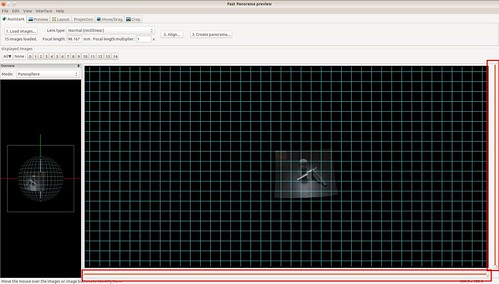
The next step will be to click the “Calculate” button next to the “Geometric” line in the “Optimize” section. I usually have good luck with one of either the “Positions” or “Positions and Translations” modes. What this step does is use the overlapping control points found in the previous step to put your photos into the right arrangement to seamlessly merge them all together. Once it finishes, Hugin will have the basic arrangement of your scene completed. To see what it’s come up with, click the icon on the top toolbar to open the Fast Panorama Preview window.
This launches a window which will, with any luck, show you a good initial arrangement of your images. The zoom controls can be a little counterintuitive in this view, but what you’ll want to do is drag the sliders on the right and bottom edges of the screen until the view area narrows in on the images in your panorama. As you narrow the view area down, it will expand to fill the whole preview area, enlarging the size of your panorama.
Now, once you’ve gotten a better look at the results of the initial stitching attempt, you may find that not everything is as you’d hoped. There are two basic classes of problem here, and while I won’t go in depth on them I will give you an overview of the steps you might take to solve them.
Images completely out of alignment. In some particularly unfortunate cases, you may find that Hugin’s automatic arrangement hasn’t even put all of your images in the right order. This can happen when some of the images are too similar to them. My general solution for this problem is to go to the “Move/Drag” tab of the Fast Panorama preview window, set the drag mode to “normal, individual,” and then move the individual images around until they’re in a rough approximation of their correct positions. I’ll then go back to the main window, select all of my images, right click and select “Control Points” > “Remove Control Points.” Then I’ll run the “Create control points” process again, but in the “Hugin’s CPFind (prealigned)” mode. Then you can run the optimizer again, and hopefully you’ll end up with a better alignment this time.
Images slightly misaligned. The less serious issue you may run into is images coming out in roughly the correct alignment, but not quite fitting together. Your solution to this problem will be to manually add more control points between the images that aren’t fitting together properly. In the main interface window select the “Control Points” tab, then select the two images that aren’t fitting properly in the dropdowns on either side of the window. You’ll want to look for recognizable features within the areas of overlap between the two images, and add them as control points by clicking on them on each side. After adding some more control points, try re-running the optimize process and see if you get a better alignment.
Now, if your images are properly aligned, you’ll want to move over to the “Move/Drag” tab and move the whole stitched image into position.
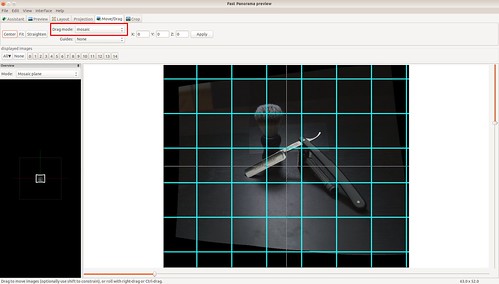
Switch your drag mode to “Mosaic” at the top, and drag your stitched image until it’s roughly centered in the frame. This should minimize any distortion due to the projection (which is another setting you may want to tinker with to see what produces the best results, you can find it on the “Projection” tab).
Next you can crop your stitched image with a somewhat self-explanatory UI in the “Crop” tab of the Fast Panorama preview window, and then you’ll be ready to stitch. For the final steps, head back to the main window and switch over to the “Stitcher” tab.
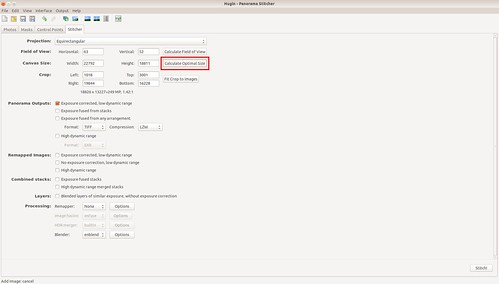
Here you’ll want to hit the “Calculate Optimal Size” button to get your output canvas sized appropriately. Another thing to do if this is your first time using Hugin is to open up the settings (found in the menus at the top of the screen under “File” > “Preferences”) and switch over to the “Assistant Tab.”
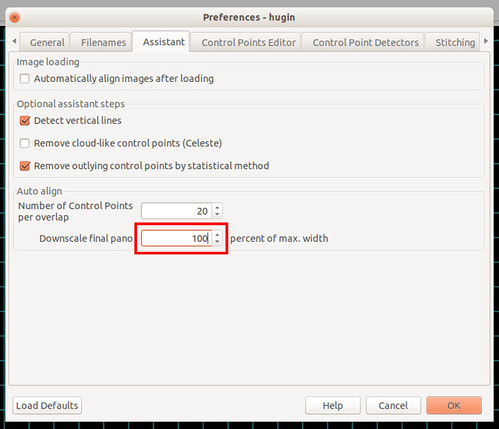
Here you’ll find a setting labeled “Downscale final pano,” which by default is set to scale your stitched panorama down to 70% of its actual size. Assuming that you want your full sized image, go ahead and set this to 100. Then you can hit “Ok” on the settings window, go back to the main interface and push the “Stitch!” button at the bottom right.
If you haven’t already, this will force you to save your project. It will then ask you for a file name for the output, and once you’ve selected that it will pop up a batch job manager and a status window that shows the progress of your stitching operation. This can take a very long time, potentially hours depending on the size of the image and your computer. When it finishes, you should have a TIFF file of your completed image in the location you told Hugin to put it.
What I’ve sketched out for you here are the broad strokes of the process, but I highly recommend tinkering around with Hugin’s UI and looking up their documentation when necessary to get a better feel for how the program works. Once you have a flow that works for you, you can use it to produce some truly mind-bogglingly large photos with the help of your handy view camera.