Largeish Format, Part I: The Theory
July 1, 2018
This is the first part of my series on creating stitched large format digital images. Part II is now available.
Over the past few months, I’ve started working with a 4x5” view camera and using what I believe is a somewhat novel technique for digital imaging with it. There is, unfortunately, no commercially available digital back at the moment that comes anywhere near the size of 4x5 film, let alone 8x10 and larger. LargeSense may change that in the near future, but the single-capture large format cameras they’re developing are going to be very bulky and exorbitantly expensive (expected price for the upcoming release of the 8x10 version is $106,000 USD).
You can, however, mount a digital medium format back (or a mirrorless camera) to the rear standard of a view camera. Combined with rise, fall and shift on the rear standard, you can sample different portions of the image circle projected by a large format lens for static scenes. Those samples can then be stitched together digitally, producing a single very large image. Using this technique I’ve gotten up to an effective sensor size of around 3x4 inches, which is why I’ve taken to calling these photos “largeish format.”
If you’ve followed photography in the digital era, you’re probably aware of the concept of crop factor. A lens projects an image of a certain size, but the digital sensor you use to read that image may be smaller than the one the lens was originally intended for if you are using, say, an APS-C sensor DSLR with 35mm lenses. The same thing happens to a much greater degree when you attach a digital medium format back (the sensors of which tend to max out around 54x40mm, with some, like mine, even smaller than that) or a mirrorless camera to a 4x5 view camera.

Not only is the intended film format of the lens much, much larger than the sensor the image is actually being projected on, but large format lenses have to be made to cover their film size and then some. This is because large format cameras typically allow the use of camera movements. Unlike an SLR camera, in which the film or sensor is rigidly locked in parallel with the lens mount, the front and back standards can be moved around separately from each other. You can tilt them back and forth, swing them left and right, and shift them up, down, left and right within their own planes. In order for these movements to be practical, the lens needs to project a big enough image circle for the film to move around some without running into the edges.
When you use a relatively tiny digital sensor instead, you now sample a very small portion of the overall image circle. As a consequence, there’s even more room to move the standards around without bumping into the edges of the image circle. What if, however, you want to record more of the circle than your sensor can read in one shot? Well, if you confine your tilts and swings to the front standard alone, you can move the rear standard around within the same image plane to see different parts of the same image circle. Imagine, for instance, first taking a single frame in the center of the image circle, then shifting the rear standard up and taking another frame.
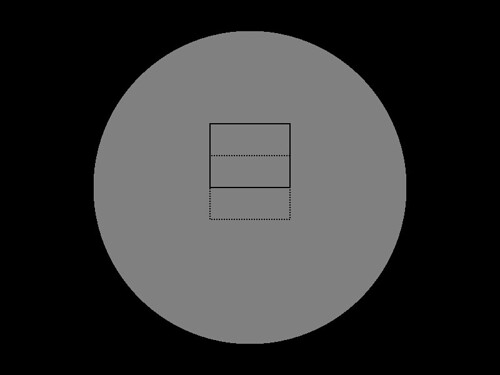
Assuming the lens was kept in the exact same position in between the two shots, the overlapping parts of these frames should blend nicely together. They may not be pixel-perfect because of machining tolerances and sub-pixel alignment, but any decent panorama software should have a relatively easy time stitching them together. Now imagine that we keep moving the back around, collecting more and more samples around the different parts of our image circle.
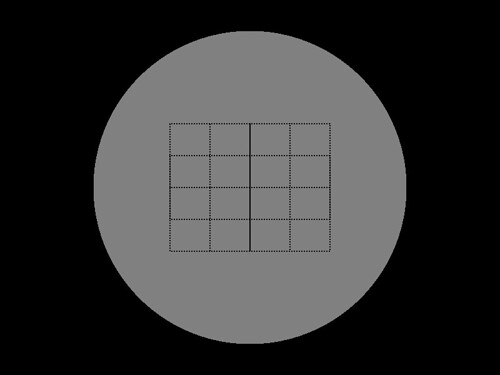
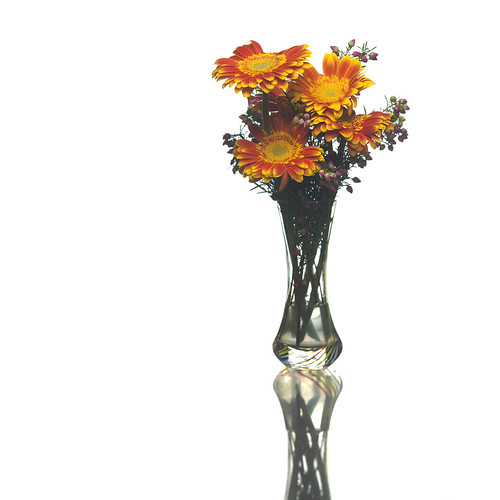
Stitch those photos together, and now you’ve got yourself a pretty respectable approximation of a large format image. Maybe not all the way there, but close enough to do some things you can’t effectively do on smaller formats. The catch, of course, is that your subject and camera have to remain perfectly still throughout the entire capture.
I use this technique with a Sinar P2 camera and a Leaf Credo 40 digital back. You should be able to emulate it with any large format studio camera (and, to a certain extent, field cameras with a special adapter) and digital back. The nice thing about this process is that there’s no particular need for a super high resolution, modern digital back valued at tens of thousands of dollars. Since you’re stitching together multiple images you’ll have all the resolution you could ask for and then some, and with a little bit of overlap the stitching process will even help to smooth out some of the sensor artifacts of older digital sensors. You can also buy an adapter to attach a mirrorless camera to a view camera, but the smaller sensor will somewhat limit the size of your capture.
Over the next few weeks, I’m going to write three parts on this topic. First, the technical details of using a Leaf digital back with large format cameras and lenses, because that alone can be complicated. After that I’ll write a piece on composing and shooting a scene for large format digital stitching, and then finally one more on the stitching process itself.