Carrying Cameras
September 30, 2016
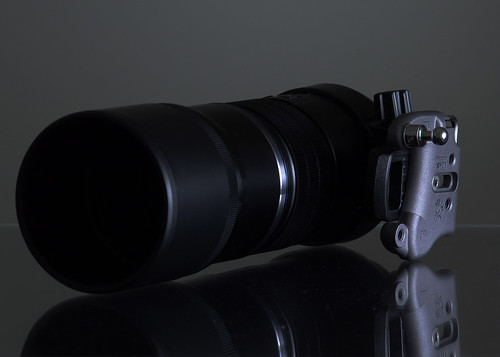
When I first started photography, I had a pretty straightforward method for carrying cameras with me: I threw the strap over my shoulder and carried them. If I needed two, I threw one strap over each shoulder. If I needed to carry, say, a 300 f/2.8 around with me, I put it on a monopod and threw that over a shoulder, or just threw the lens strap over my shoulder and carried everything that way. When I first started photography, I was also fifteen years old. That was a little over a decade ago, and nowadays my shoulders–and my back–are a little less rugged than they used to be. So for the past couple years, I’ve put some effort (and more money than I’d like to admit) into working out the best way to carry cameras around with me. In particular, in the last couple of months I’ve been working on coming up with the best way to carry a pair of cameras, a long lens, and some supplies with me on long-ish treks–so far up to about eight miles at a time. This is what I’ve come up with.
Remote Flash in 2015
October 13, 2015
For about five years now, I’ve been using a set of old Nikon speedlights SB-25s and SB-26s modded to give me remote power control with my RadioPopper JrX triggers. It was a lovely little system for me, and I got accustomed to being able to adjust my power levels at will from a distance. Unfortunately, after five years of use things are starting to fall apart. The 3.5mm jack I hacked into one of my flashes came loose, and in a single day the plate on the bottom of my JrX transmitter fell off and I lost the foot of one of my flashes to a falling lightstand.
I finally had to admit that it was time to stop super-gluing things back together and update my flash system. First I went looking for a replacement to my fallen JrX transmitter, only to find that RadioPopper has discontinued the JrX line of radio triggers. I ended up getting my hands on three separate sets of triggers for some amount of time, so I’ll give a brief review of each in the hopes that it might save others some time and frustration of their own. If you just want to see the solution that ended up working for me, skip ahead to the last section.
Shooting Glass
January 20, 2014

Glass is one of the trickier materials to photograph, mostly because it’s both transparent and highly reflective. Its transparency can be perplexing–how are you to photograph something that you can see right through?–and its highly reflective nature confounding as unwanted reflections and glare mar your images. With a thorough understanding of those properties, however, you can manipulate them to get just the image you want. In this case, let’s take a look at the process I went through to make this image of a glass of tea.
Automating Mass Portraits With QR Codes
May 15, 2012
For Mother’s Day this year, my church decided to offer free portraits. We did something similar for a back-to-school event last year, and while it was well-received it also ended with our communications director spending the better part of a week sifting through photos and breaking them up by family. This time around, I decided to see if I couldn’t automate that process, and in the end we managed to pull it off with almost no human post-processing effort, and no extra equipment aside from a box full of printed cards. We sent everyone home with a card that gave them everything they needed to get their photos online the next day. You can find all the code I wrote to make it work in theGithub repositoryI set up for the purpose (click the “Zip” button at the top of the page if you just want to download everything). You’ll need Python to run my scripts, and a web server that supports PHP if you want to use the web viewer. This is how I made the whole thing work, and how you can replicate the process.
Modifying an SB-25 for 3.5mm Sync
March 12, 2011
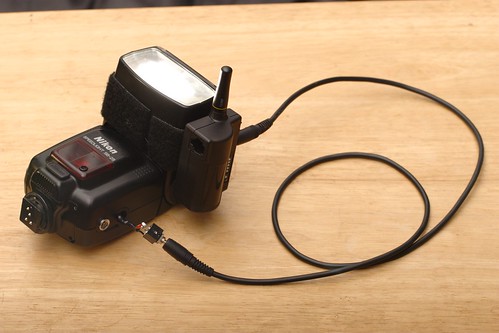
I’ve been using Radiopopper JrX Triggers for a while now, and one of their more useful features is remote power control. They can remotely control the power level of up to three groups of flashes, provided the flashes support the older style of TTL: this works with Nikon flashes up through the SB-800, Canons up through the 580EX, and probably others I’m not aware of. The catch is that to make it work, you have to attach your flash to their $30 RPCube. With Nikon flashes, you can make it work by building custom cables with 3.5mm on one end and Nikon’s TTL connector on the other, but those are expensive to build and easy to lose. My solution is to build a 3.5mm jack right into the flash sop you can connect it directly to the Radiopopper with cheap cables. I’ve done this with both SB-25 and SB-26 speedlights before. In this post I’ll be showing the modification of an SB-25, but the technique is not difficult to apply to an SB-26.
The mod is relatively simple, but you’ll need basic soldering skills. In addition, my method removes the auto flash sensor to fit in the 3.5mm jack, so you won’t be able to use the auto mode afterwards. Of course, messing around inside a speedlight can be dangerous, so I’ll start out with the obligatory disclaimer.
WARNING: The inside of your flash contains a very large, very dangerous capacitor. Take caution opening and modifying the flash. You are solely responsible for any damage you cause to your flash or yourself.